This article will walk you through the installation process to setup the Infogroup Data Axle: Enrich & Prospect in your Salesforce CRM. You must complete steps 1.1 & 1.2 before you can continue setup.
1.5 Enable the Prospecting Tab
1.8 Configure Connected App Permissions
1.9 Authenticate Installation Key
1.11 Configure Custom Object Layout
1.12 Enable Prospecting Tab (Optional)
1.13 Disable Duplicate Detection
1.14 Salesforce IP Restrictions
Set up Account and Lead Source with Process Builder (Optional)
1.3 Setup
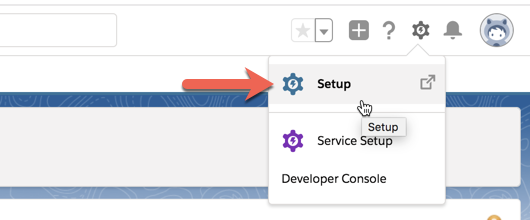
Click Setup in the top right corner of Salesforce.
Classic:
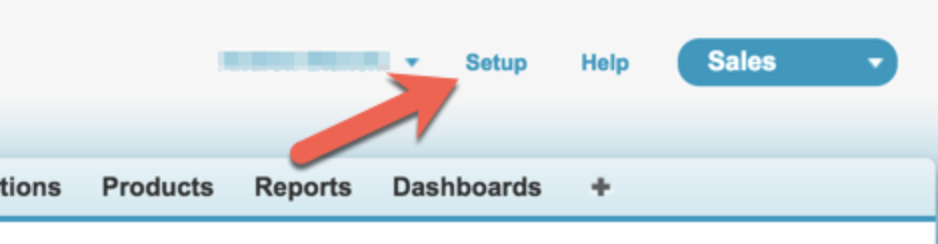
Lightning:
From this point forward in the tutorial if you get lost or confused you can always get back to a clean slate by returning to Setup. All remaining tasks will be completed in the Admin section of Salesforce.
1.4 Create a Permission Set
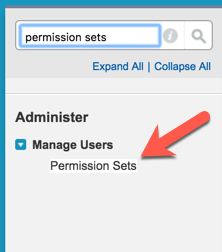
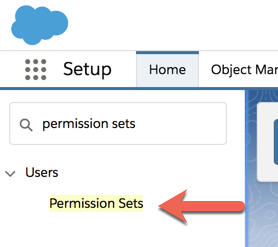
Type “permission sets” into the quick find / search box.
Click on the Users > Permission Sets link.
Classic:
Lightning:
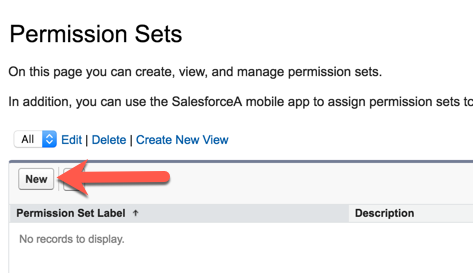
Click the New button:
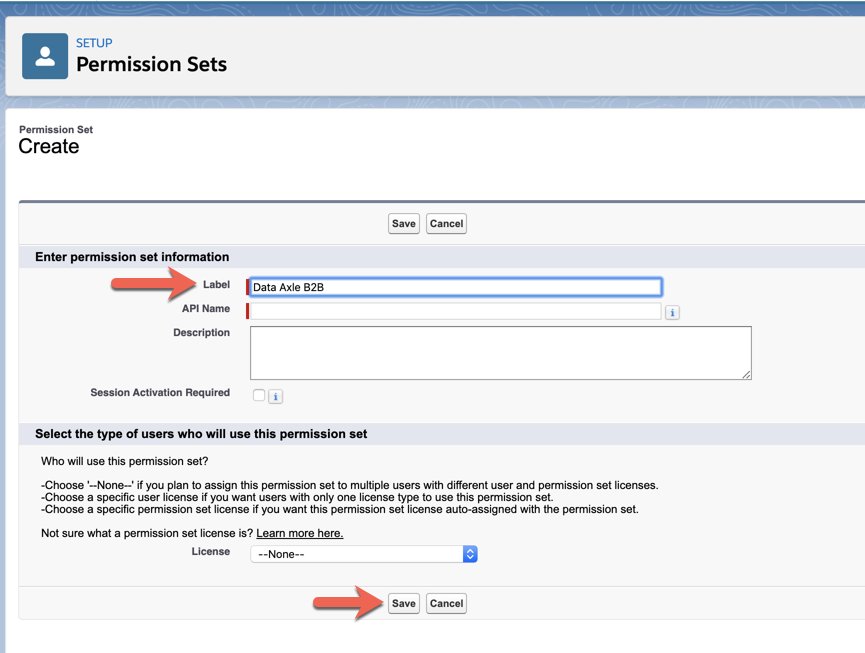
Type a name (Example: Data Axle B2B) for the permission set in the Label field. Salesforce will automatically populate the API Name field.
Click the Save button.
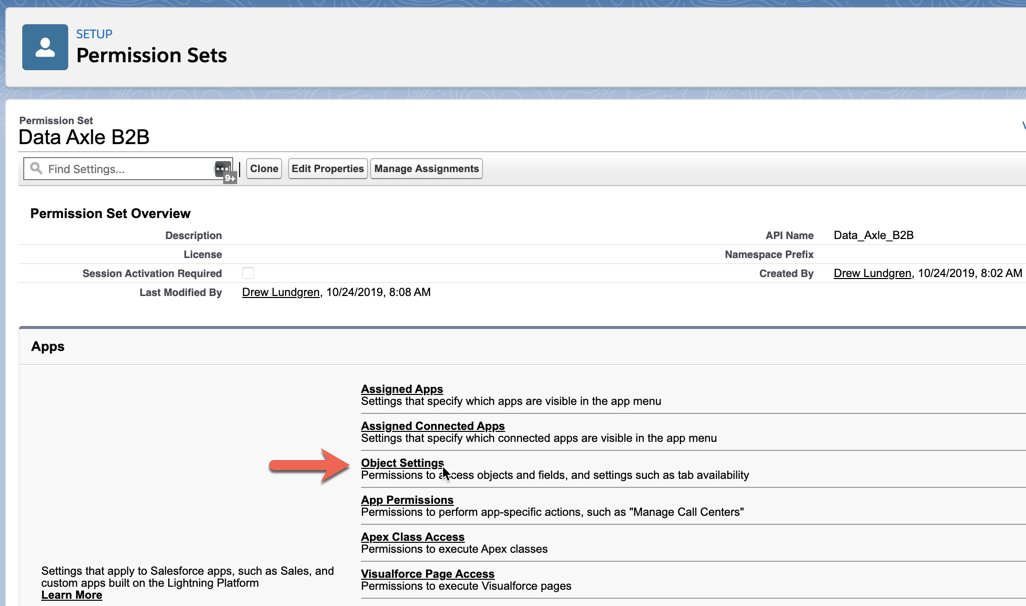
Click the Object Settings link.
Note: The following steps will have to be repeated for ALL custom objects. Please talk to your sales rep to obtain the list of custom objects.
Scroll through the list of Objects to find the custom objects.
Select the custom object associated with the package.

Click the Edit button.
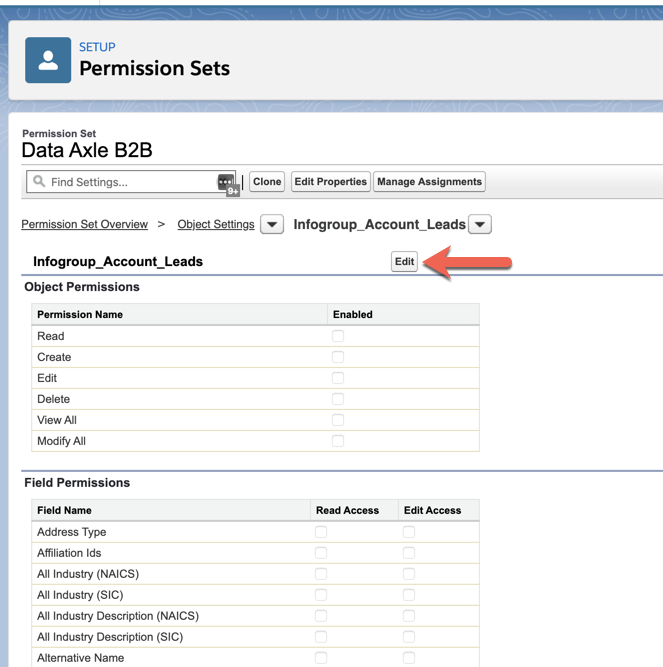
Check all checkboxes. Then Click the Save button.
For custom objects with many fields, this step is tedious. For more advanced users, copy and paste the following Javascript into your browsers developer’s console. This Javascript code will only work in Salesforce Classic. If you are using Lightning, please switch to Classic mode to execute.
var allInputs = document.getElementsByTagName("input");
for(var i =0, max = allInputs.length; i < max; i++) {
  if(allInputs[i].type ==='checkbox') allInputs[i].checked = true;
}
This video shows you how to use the javascript code with the Developers Console.
Repeat the above steps for all other custom objects associated with the package that is being installed.
Other custom objects may include custom contact or lead objects.
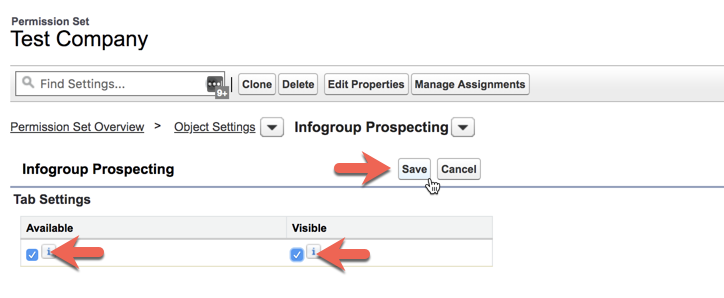
1.5 Enable the Prospecting Tab
On the Permission Set page search for “prospecting” then select that custom object.
Click the Edit button.
Check both Available and Visible
Click the Save button.
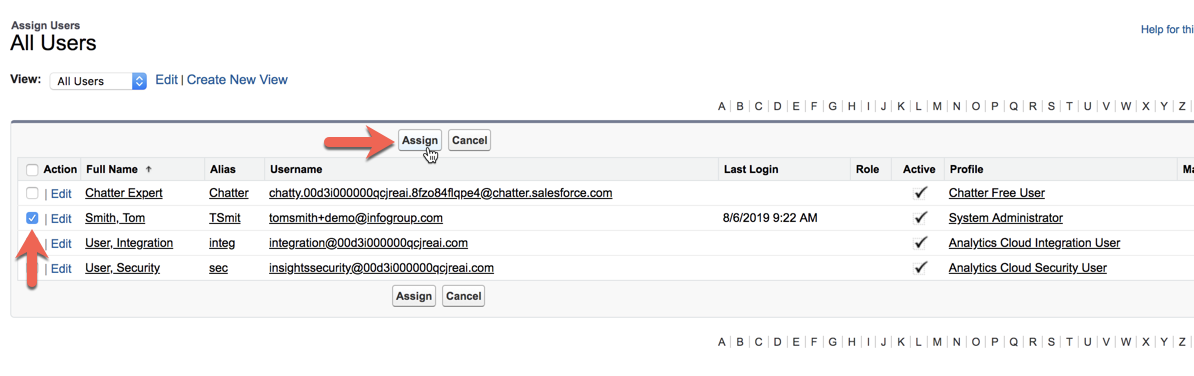
1.6 Assign the Permission Set
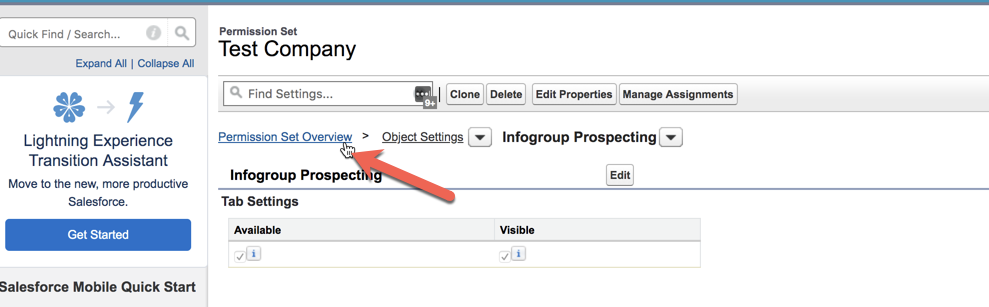
Click the Permission Set Overview link.
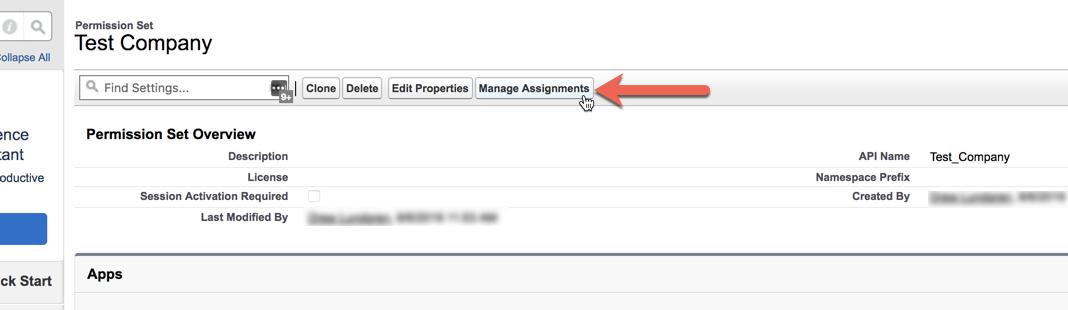
Click Manage Assignments.
Click Add Assignments.
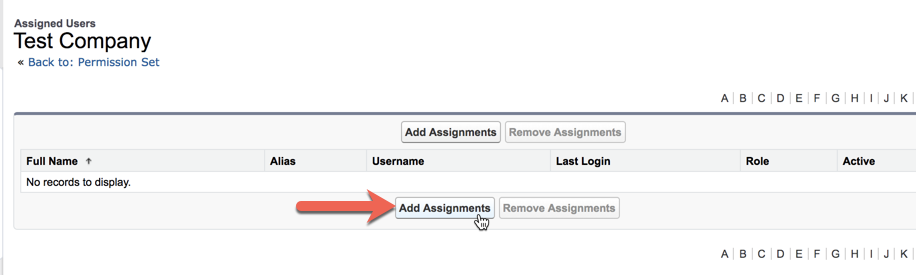
Select the checkbox next to the user you want to assign.
Click the Assign button.
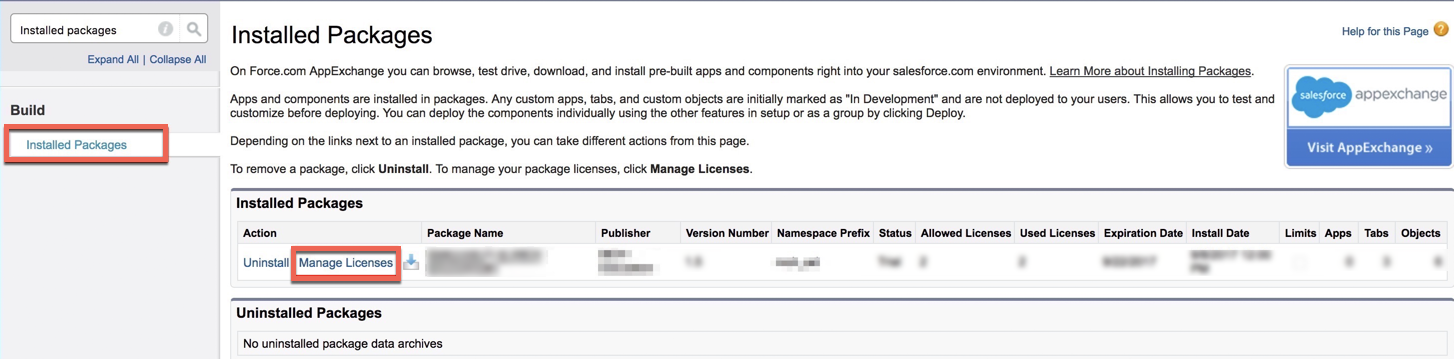
1.7 Manage Licenses
You will need to give each user a license in order for the user to access the package. If you do not assign the user in Manage Licenses, they will not be able to access the package, and an error message will not display. They will simply not see any of the packages components. Adding a license will not automatically assign the permission set. You must also assign each user to the permission set.
Type “installed packages” into the quick find / search box.
Click on the Build > Installed Packages link.
Click the Manage Licenses link next to the package name.
Click Add Users.
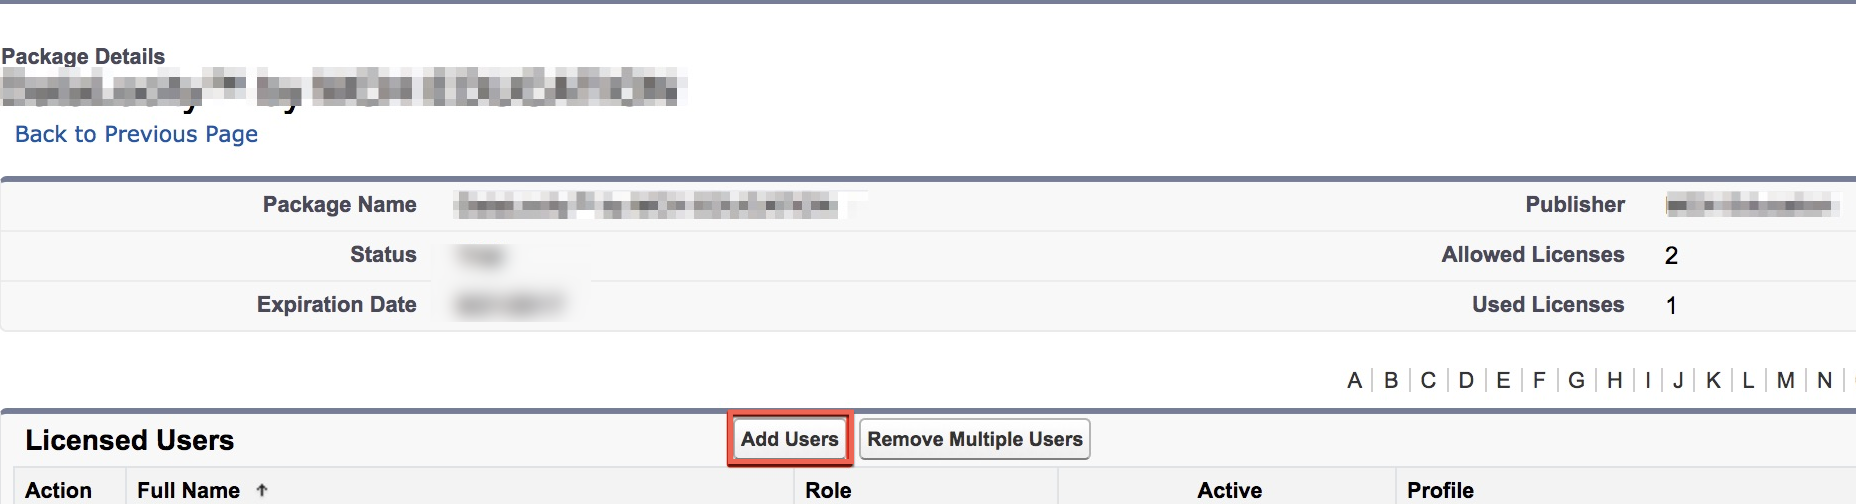
Select the checkbox next to your user.
Click the Add button.
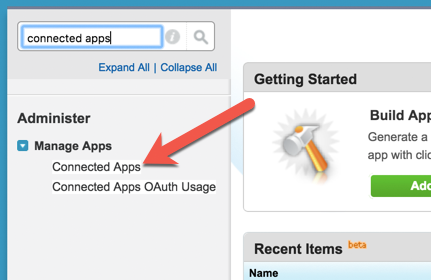
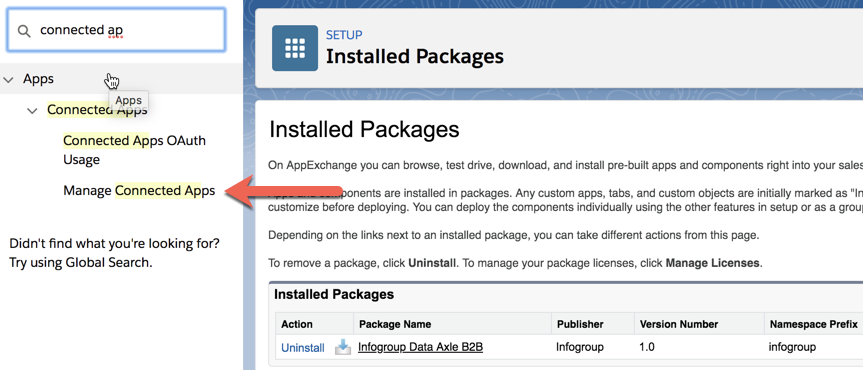
1.8 Configure Connected App Permissions
Search for “connected apps” and then click Manage Apps -> Connected Apps
Classic:
Lightning:
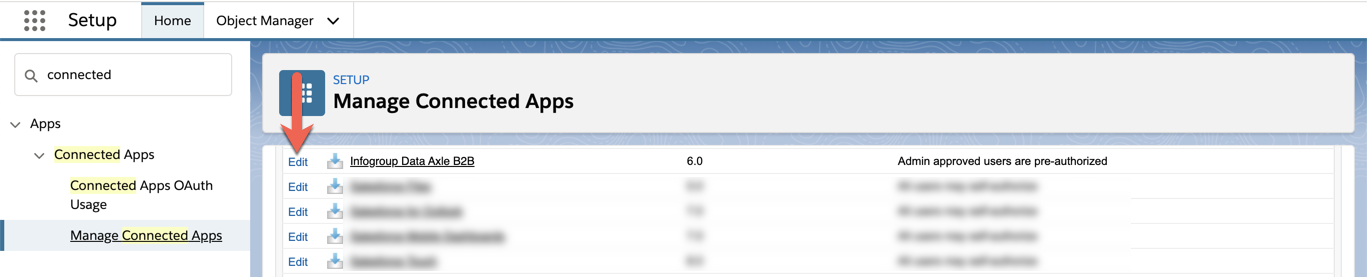
Click the Edit link next to the Infogroup app.
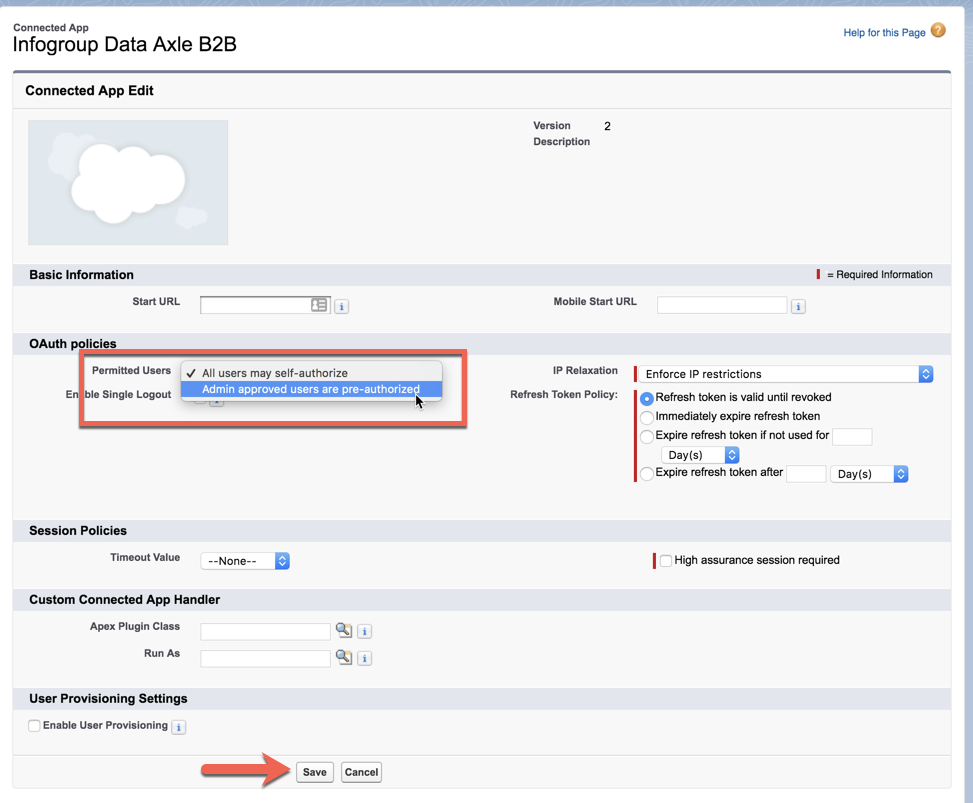
Under “Permitted Users”, select “Admin approved users are pre-authorized”
Click Save.
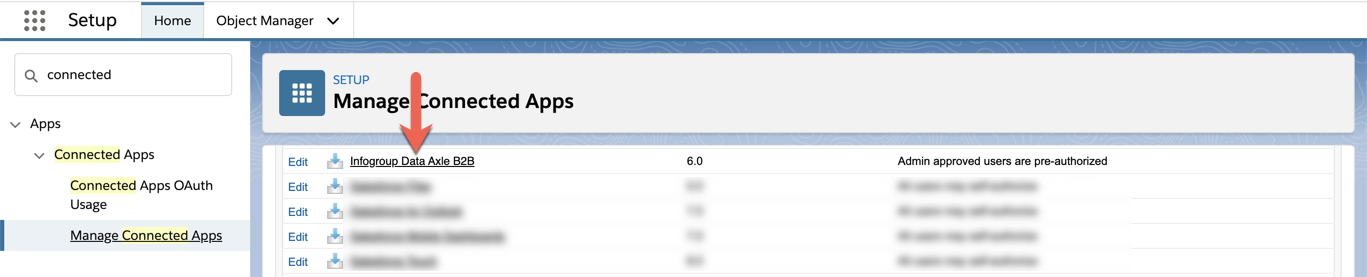
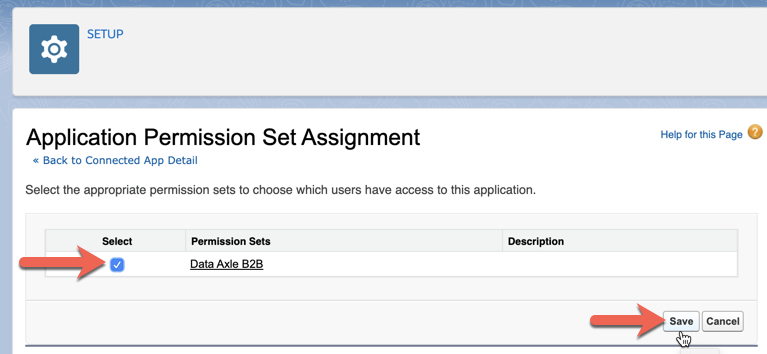
Click on the Master Label link for the Connected App.
Scroll down to the Permission Sets section, Click the Manage Permission Sets button.
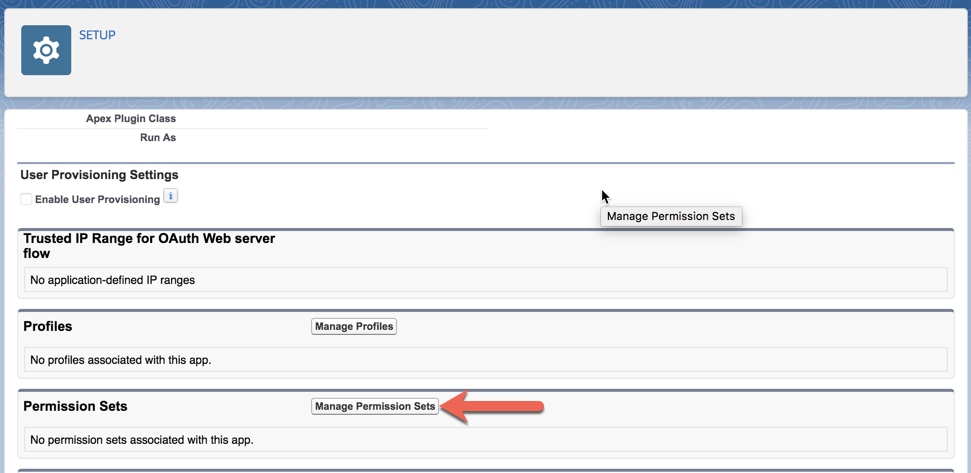
Select the checkbox next to your permission set you created earlier.
Click the Save button.
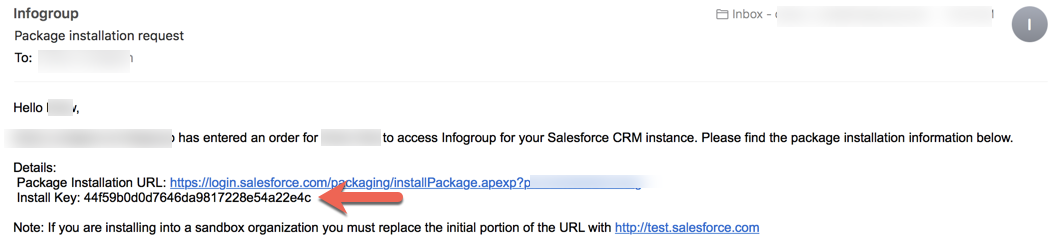
1.9 Authenticate Installation Key
The Salesforce user that enters the install key and authenticates is the one used for Salesforce API access.
As a result, all records created or modified by the integration will be created or modified by the user who authenticates the installation key.
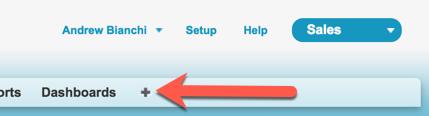
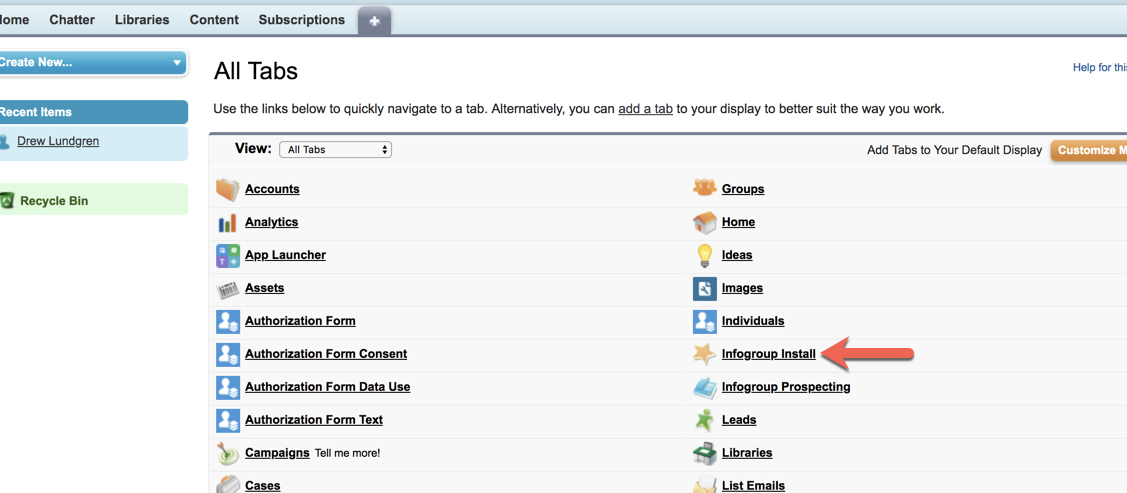
Classic: Click the + on the top right of the SalesForce navigation.
Under All Tabs scroll down and Click the Infogroup Install link.
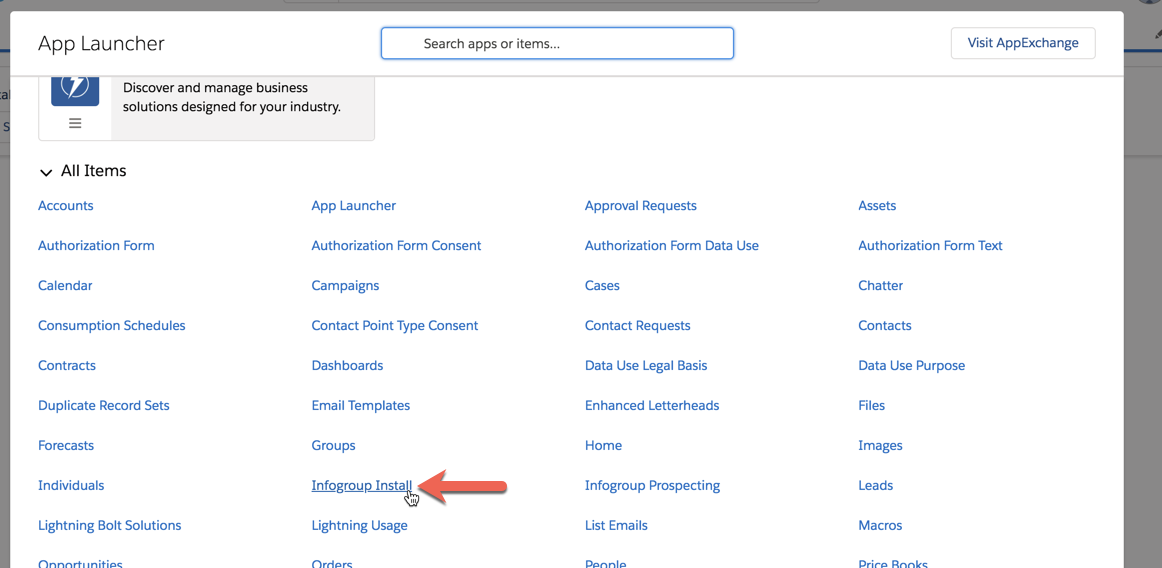
Lightning: Click the App Launcher icon on the top left of the menu bar.
Click the Infogroup Install link.
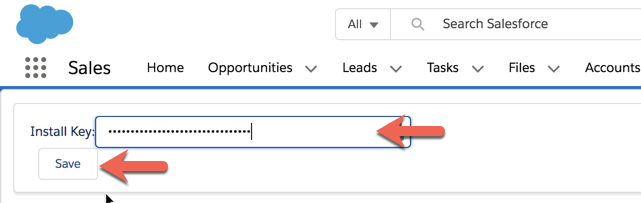
Enter the installation key from the order email.
Click the Save button.
You should receive an “Authentication Successful” message. If not, check your install key.
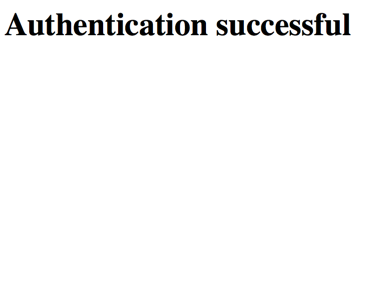
Close the Authentication successful tab, return to Salesforce.
1.10 Configure Page Layouts
You will need to configure a layout for each Object that is being added / modified to the Salesforce instance. This likely includes an Account and Contact object. Perform the following steps for each Salesforce Page that requires updating.
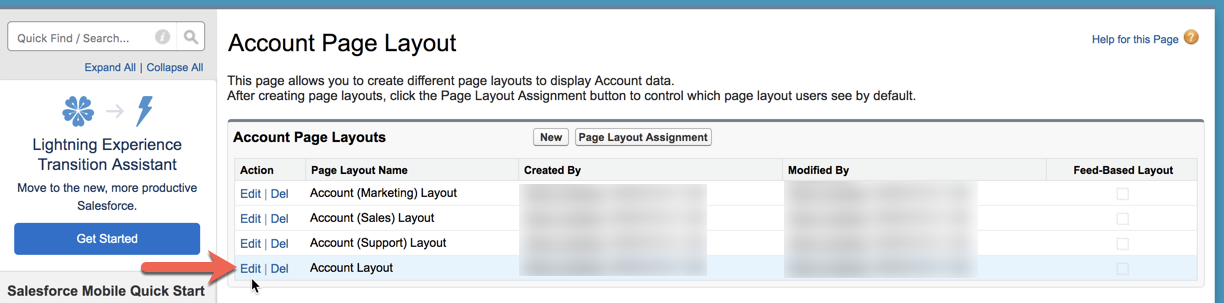
Type “page layouts” into the quick find / search box. Click on the Accounts -> Page layouts link.
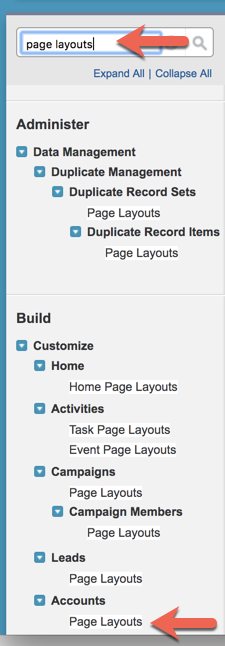
Click the Edit link next to Account Layout (other layouts may be in use, depending on Salesforce configuration)
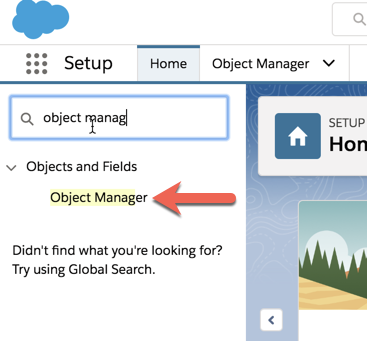
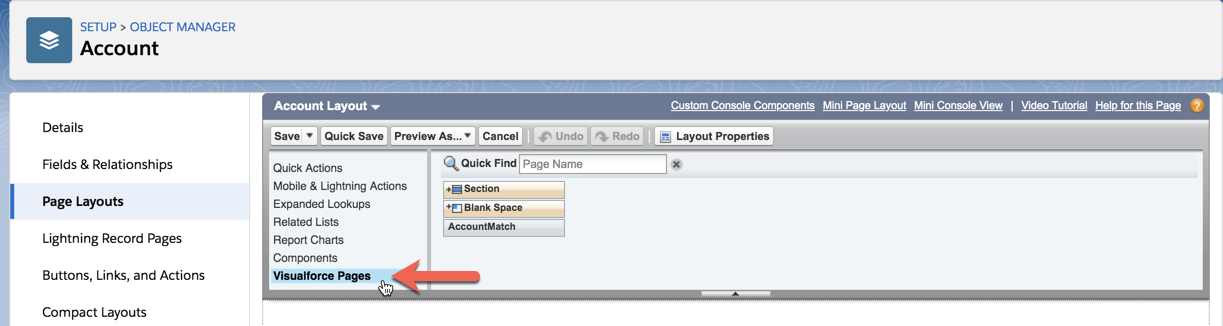
Lightning: Type “object manager” into the quick find / search box.
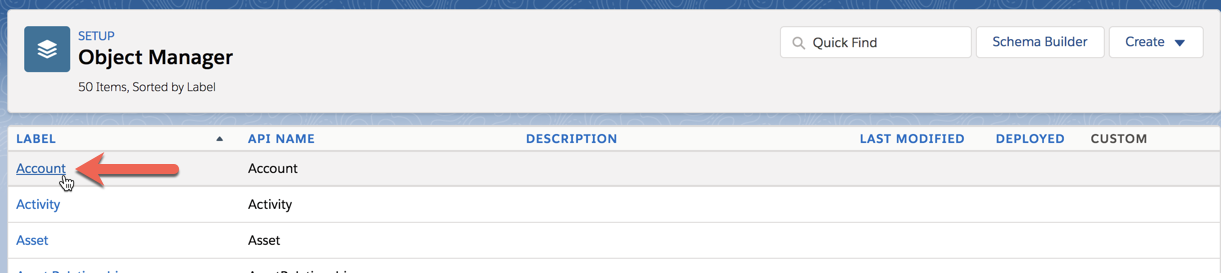
Click on Account.
Click Page Layouts in the menu. Click Account Layout link.

On the top left selection list Click Visualforce Pages. You may need to scroll to see this.
Create a new section: Drag “Section” from the top to the layout below, place it below “Custom Links”
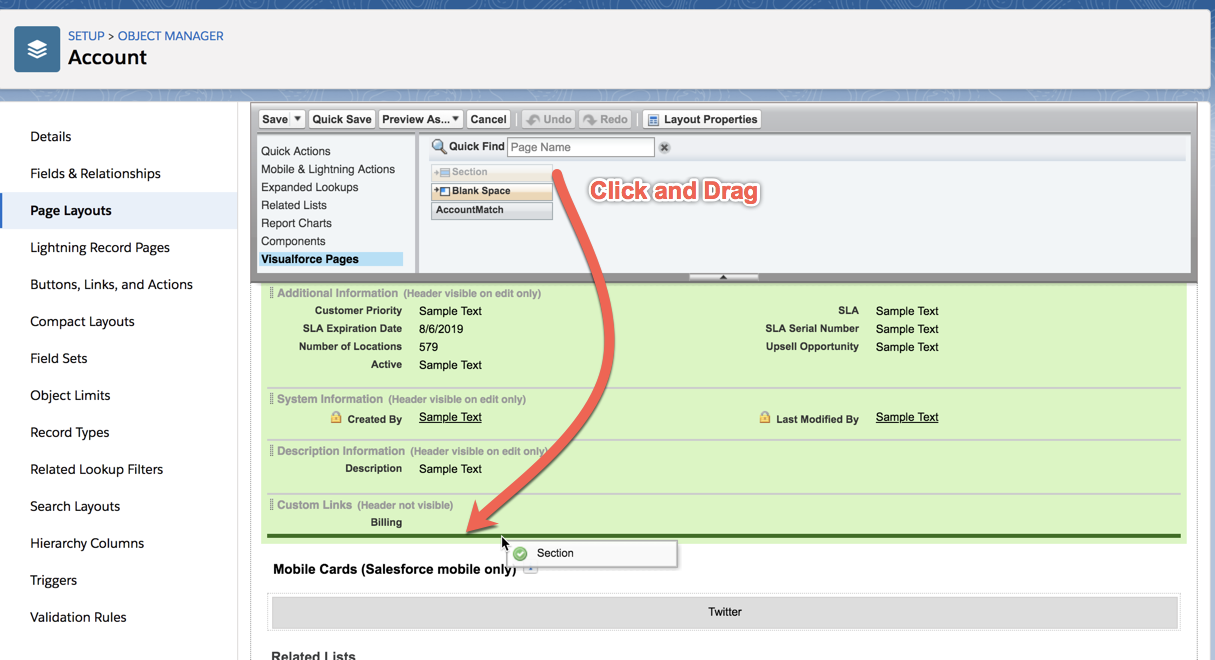
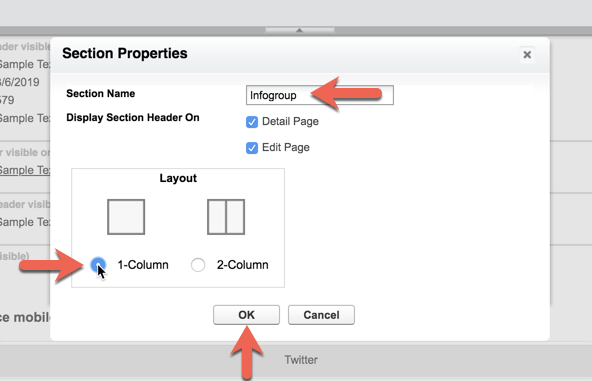
Enter a Name for the section
Select 1-Column
Click the OK button.
Click and Drag AccountMatch into the newly created section.

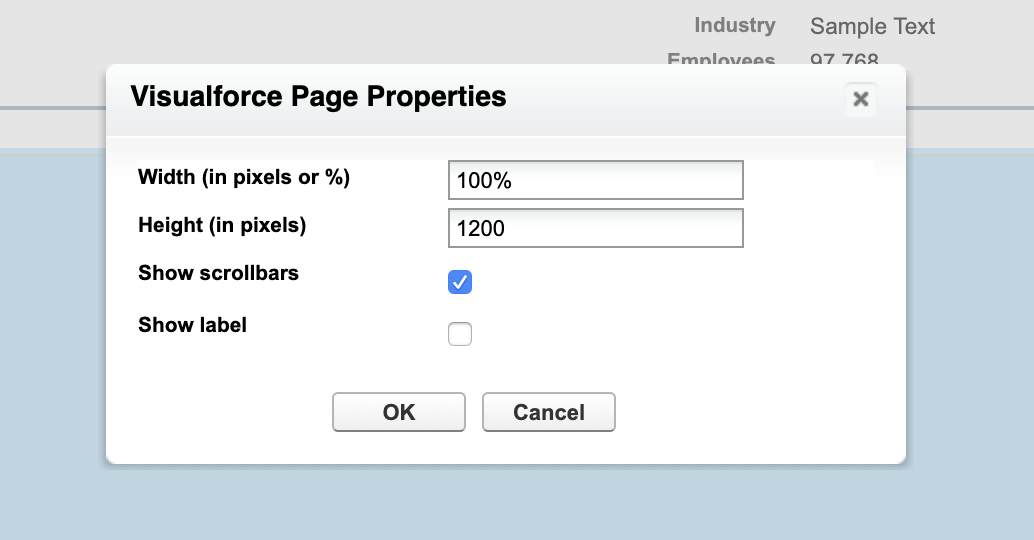
Move the mouse to the top right of the “AccountMatch” page area. A wrench icon (properties) should appear. Click the wrench.
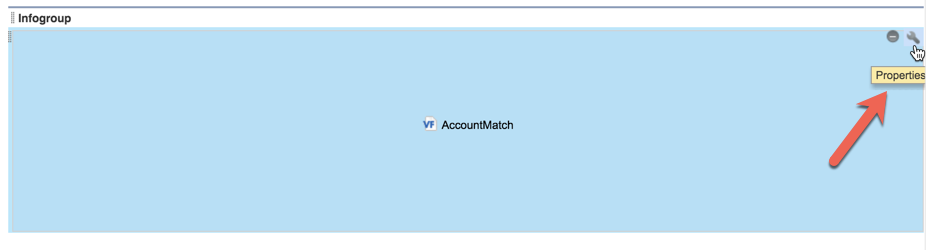
Change the Height to at least 1000. You may want to customize the height differently between the Account, Lead and Contact objects depending on your page layout and application.
Check Show Scrollbars (optional)
Click OK.
Click Save located at the top of the control widget.
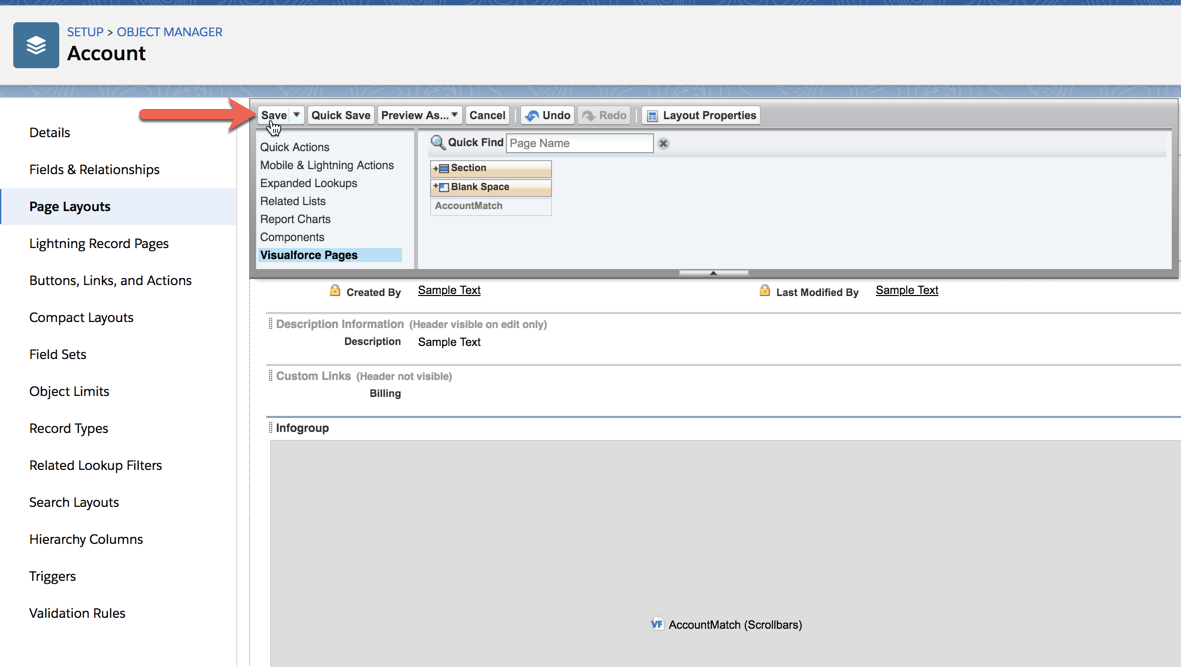
Repeat the previous steps for other Salesforce Objects that are being modified, most likely Contact.
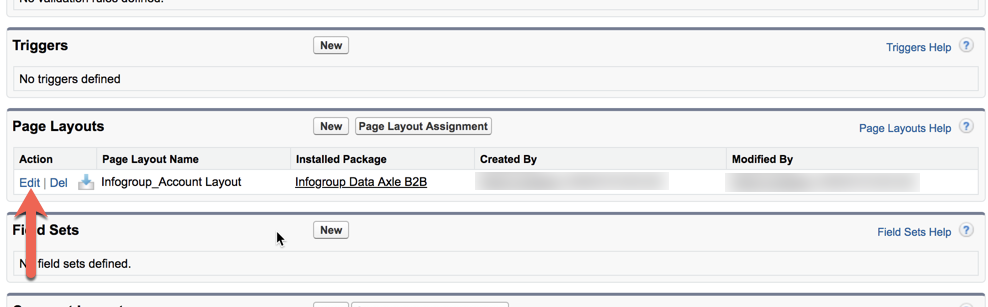
1.11 Configure Custom Object Layouts
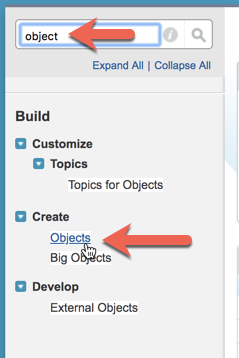
Classic: Type “objects” into the quick find / search box. Click on the Create > Objects link.
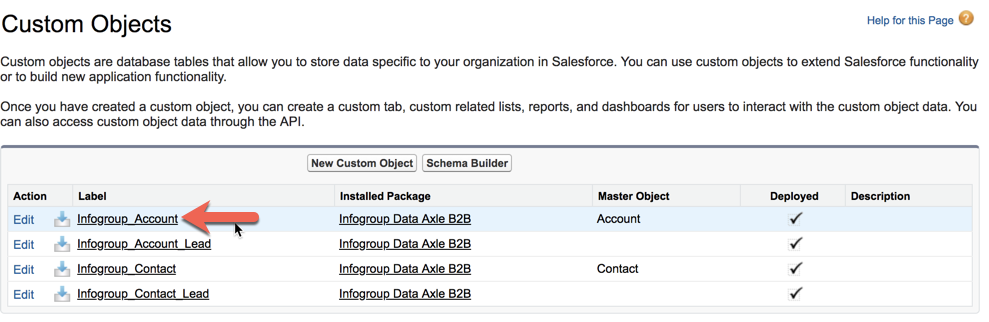
Click the custom object associated with the account (example: Infogroup_Account).
Scroll down to “Page Layouts”, click “Edit” next to the only layout listed.
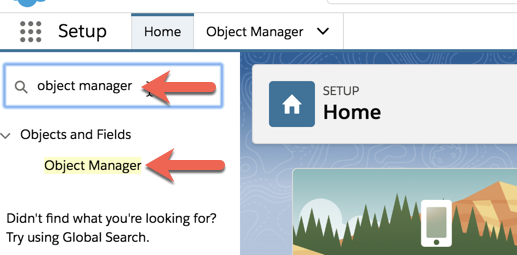
Lightning:
Type “object manager” into the quick find / search box.
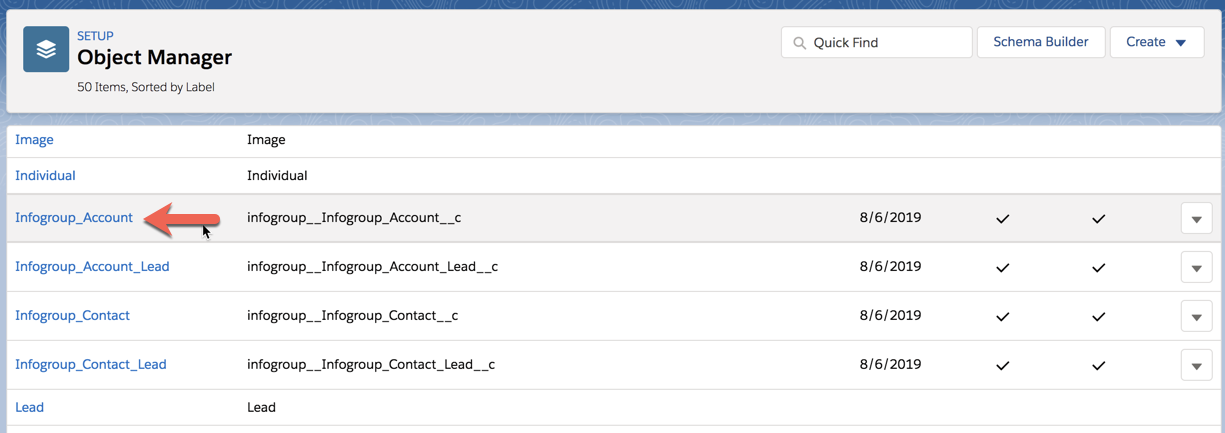
Click the custom object associated with the account (example: Infogroup_Account)
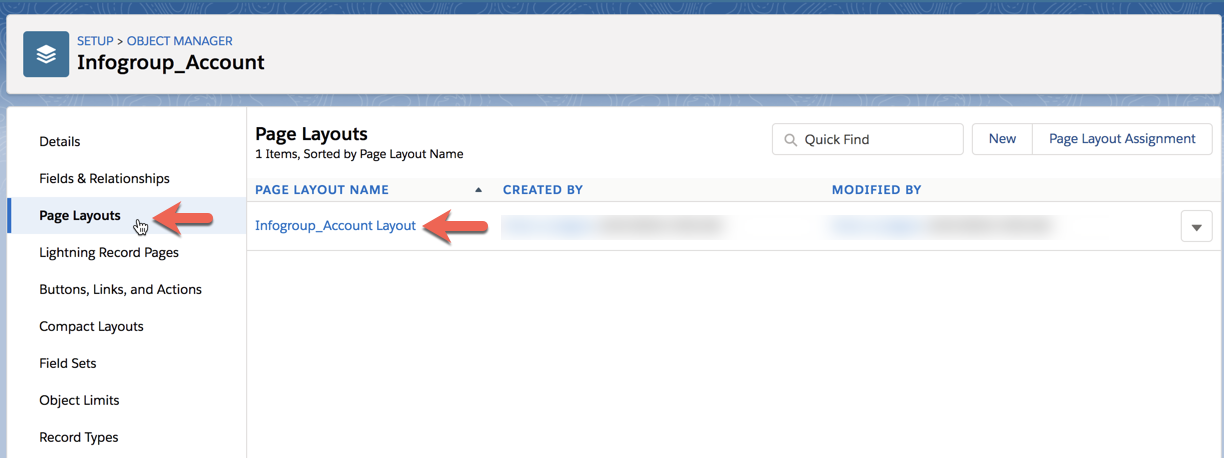
Click Page Layouts in the menu. Click custom object Layout link.
Drag fields from the list to the layout below.
Any fields can be selected, however only fields the customer has licensed in their order will be populated.
Click “Save”
Repeat these steps for any other custom objects, most likely Contact.
1.12 Enable Prospecting Tab (Optional)
Classic Only
Click the ”+” on the top right of the Salesforce navigation
Click “Customize My Tabs”
Under “Available Tabs” select the prospecting tab
Click the right arrow to add it to the selected tab list
Click “Save”
The tab will now appear in the Salesforce top navigation
1.13 Disable Duplicate Detection
Salesforce provides standard duplicate rules for business and person accounts, contacts, and leads. A duplicate rule defines what happens when a user views a record with duplicates or starts creating a duplicate record. The default Salesforce duplicate rules may be too strict, and may interfere with prospecting similar records.
The user has two options: (1) disable duplicate detection for all users or (2)) disable duplicate detection for the only the user who installed the package (this is the user new fields will be added as)
Click Setup
Type “Duplicate Rules” into quick find / search box. Click Duplicate Rules which is located under “Duplicate Management”
1) Option 1 - Disable for all users
For each duplicate rule, click the rule name and select “Edit”
Click Deactivate will disable the rule.
Click Back to List: Duplicate Rules and repeat for “Contact” and “Lead” rules.
2) Option 2 - Disable for single installation user
For each duplicate rule, click the rule name and select “Edit”
Under conditions, add a condition with “Current User: Username”, “not equal to”, and the Salesforce username (login) of the user that installed the package.
Repeat for all applicable rules.
1.14 Salesforce IP Restrictions
Salesforce has a setting that will restrict users from logging in from outside trusted IP address ranges. If this setting is enabled, you may encounter an “Authentication Failed” error during installation.
Please add these IP Addresses to the list of trusted IP addresses in Salesforce.
- 52.44.250.212
- 52.55.250.218
- 52.70.95.167
More information on how to set trusted IP ranges can be found on Salesforce Help:
Restrict Where and When Users Can Log In to Salesforce
Set Trusted IP Ranges for Your Organization